

On-off Workshop: The Photo
Mat Walters
Monday, February 1, 2021
This one-off workshop for Key Stage 3 creates a quick, structured improvisation that can be used as a one-off activity or can be developed into a story over a number of lessons. It works well at KS3 but can also be used as a starting point for GCSE Drama devising work.
ADOBESTOCK/JAKAYLA
Starting point
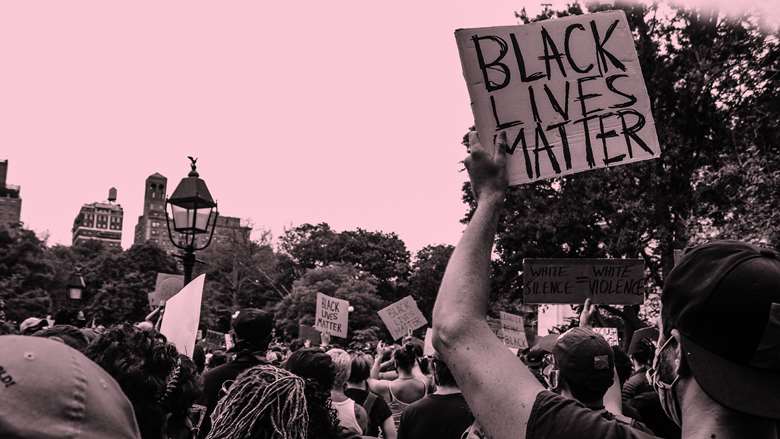
Do an image search using the words ‘black and white photographs of crowds’ and project any one for the class that has a sense of movement in it. There will be many options.
Project the image (if time allows, do a small number of copies of the image for groups in advance). Ask the class to look at the image and then to individually come up with a 4- to 8-word title for the image that sums up what they think might be happening. This does not have to be exactly true but should fit the image seen.
Put the class into small groups of approximately four. Ask them now to discuss the scene titles they have come up with and decide on which one they think is best and has the most dramatic potential. If copies are available, one student should write the title at the bottom of the image.
Stage 2
Now ask the individuals in each group to choose just one person in the photograph each and then, as a group, create a freeze frame of the photograph just including their chosen ‘characters’. They should stand in exactly the same way that they are represented in the photograph, so same position onstage, body language, facial expression, etc. They should mime holding any objects shown in the photograph. Allow a short rehearsal time and then get the groups to show each freeze frame. Project the image while work is being shown and get the audience to tweak positions shown in the freeze frame, so it is a perfect as possible representation of the photograph.
Stage 3
Now ask the group to improvise the scene prior to the one in the photograph, but they must use their invented title as the basis for the context of that scene. This scene should be naturalistic in acting style and should have dialogue. The scene must only last 90 seconds but should lead straight into the freeze frame and make that freeze frame clearly representative of the title chosen. The end of that scene should be a freeze frame which places the characters exactly frozen in the positions shown in the photograph. Allow a short rehearsal time and get them to check the final positions exactly with the projected photograph.
Stage 4
Now add slow motion into the improvised scene, so that the scene finishes with a wind down into their final photograph positions over 15 seconds. Choose one group member to lead this in rehearsal by initially counting down. There should be no dialogue during those last 15 seconds, so the action slows naturally without the need to attempt slowed down speech.
Stage 5
Ask groups to consider adding a sound effect, to be created vocally by themselves, that they could create and use during the 15 second wind down to the freeze frame at the end of their scenes.
This should be something that helps them to exactly time their movements to 15 seconds and also should be something that helps to add atmosphere to that moment in their piece. For example, could this be the sound of a heartbeat? Or breathing? Or a wind sound? Or the stage whispered sound of a roaring crowd? Or a police siren? A few suggestions will help.
Stage 6
Ask groups to run their whole sequence to the final freeze frame. Then ask individuals in each group to create a final line of dialogue for this scene that could be delivered by their character as a direct audience address once they are in their freeze frame positions. This should be an inner thoughts-style line of dialogue that relates to their character, and the context created by the initial title given to the photograph.
Stage 7
Now rehearse and run the entire piece, from the initial improvised scene, through the slow-motion sequence, into the freeze frame and then finish with the direct audience address lines to the audience. Watch and give feedback.
Extension tasks
- a) Create a role on the wall for your character to develop them further.
- b) Hot seat one of the characters.
- c) Work as a group to create the next scene in the piece, following on from the direct audience address lines of dialogue. This could be inspired by:
- What happens next in the plot, a naturalistic sequence that continues the adventures of the characters as a group.
- What happens next to just one of the characters in the scene. A scene that follows their adventures next.